Hello World

No Code. For Coders.

What separates Qorus from other Rapid Application Development (RAD) tools and low-code/no-code platforms is that Qorus is a “no-code platform for coders”. In other words, it provides a complete no-code solution to all of your automation and data integration needs without hiding the implementation details.  Qorus allows you to write your own code that can be packaged as self-documenting, reusable building blocks.

You’ll explore both routes to implementing the “Hello, world” example.

Source Directories

Qorus organizes objects through sub-directories called source directories, this is where the code generated by Qorus is saved. The IDE will only show objects that are stored in the source directories. To create one for your “Hello, world” example:

  1. Click on the purple “Q” icon to get the extension main menu, then click on the Manage source directories button.
  2. Click on Show folders under Add source directory
  3. Now click on the green folder with a plus icon next to the building-blocks directory.
  4. Enter a name for the New subdirectory, then click on the Create and add to sources button

The No-Code Approach

As you can see from the hierarchy view on the left side of the Qorus IDE, Qorus classifies interface objects into various types. You’ll be working with the Finite State Machine (Fsm)Job, and Group objects in this example.

Fsm – Finite State Machines allow arbitrary logic to be configured and deployed by connecting states that perform an action (class connectors, API calls, etc) or affect the execution flow in the FSM (such as if statements and loops and other flow control states). When existing building blocks and actions are sufficient to cover the implementation requirements, Finite State Machines support complete no-code solutions.

Job – Jobs are simple tasks executed on a schedule, similar to a cron job.

Group – Group contain a list of workflows, user services, jobs, mappers, value maps, finite state machines, and data pipelines; groups can be enabled and disabled, and roles can have a list of groups they can access to limit access to a subset of Qorus interfaces and configuration for certain users (Enterprise Edition only).

Creating a Finite State Machine (FSM)

1. In the interface hierarchy view, click on the New file (create new) icon next to the Fsm menu entry.
2. In the Qorus Webview window, fill out the new Finite State Machine form to configure a new 
Fsm
  • Target directory: Click on Show folders and select the sub-directory you created earlier. This is where the code generated by Qorus will be saved.
  • Namegetting-started-hello-world (the name of your new FSM)
  • Description: Fsm for hello world example – The description field supports markdown, so feel free to format your text in markdown.
  • Go to the flow builder by clicking on the Go to flow builder button.
  • Drag the API Call block into Qorus’s flow designer and enter:
    • Name: Getting started log hello, world!
    • Type: state
    • Initial: true
    • Action: apicall
    • Action value:
      • Click on the Please select button on this field and select factory.
      • Continue by selecting qorus-api.
      • Continue by selecting util.
      • Complete by selecting log-message in the final position to select the API (request-response) data provider for the call
    • Toggle Allow API Arguments to true; this will allow you to enter the arguments for the given API call directly in the state
    • Find the message argument Custom tab, at the bottom, under Arguments and enter Hello, world!
    • Hit the Submit button.
  • Hit the Submit button again to save the Fsm
3. Deploy the new Fsm to the Qorus server by clicking on the cloud icon next to the Fsm name in the hierarchy view.

ℹ️ Note: The qorus-api Data Provider factory provides the log-message API provider that logs a message according to the arguments. The qorus-api Data Provider Factory is provided by Qorus and provides a set of APIs that can be used in FSMs to perform tasks in Qorus. API data providers provide introspection, they can be browsed, and all their arguments and return types are documented and can be viewed in the IDE.

Creating a Job: A No-Code Approach

  1. In the interface hierarchy view, click on the New file (create new) icon next to the Job interface.
  2. In the Qorus Webview window, fill out the new job form to configure a new job interface.
  • Target directory: Click on Show folders and select the sub-directory you created earlier. This is where the code generated by Qorus will be saved.
  • Name: getting-started-hello-world-example-no-code (the name of your new Job)
  • Description: Just for logs, getting started hello world! no code solution
    – The description field supports markdown, so feel free to format your text in markdown.
  • Base class nameQorusJob – is the abstract Qorus job class
  • Class name: GettingStartedHelloWorld
  • Schedule:
    • Minute: 0
    • Hour: 1
    • Day: 1
    • Month: 1
    • Weekday: *
  • Version: 1.0
  • Active: false (From the Optional fields drop-down list to the upper-right corner of the job form, click on Active to add it to the job) – Jobs with Active: false are only run on demand; their schedule is ignored
  • Groups: EXAMPLES (From the Optional fields drop-down list to the upper-right corner of the job form, click on Groups to add it to the job)
  • Finite State Machine: (From the Optional fields drop-down list to the upper-right corner of the job form, click on Finite State Machine to add it to the job):
    • Click the dropdown labeled Please select and select the getting-started-hello-world flow that we created earlier.
    • Add a trigger by clicking on the⊕under Triggers and fill in the following:
      • Trigger: Trigger
      • From the Please select dropdown select run
    • Hit Submit to add the flow and trigger attributes to the job
  • Hit Submit to save the job

ℹ️ Note: Without a trigger, the Fsm will not run when you run the job. Though you can run the Fsm through Qorus API Call UserApi::executeFsm(), with a pure no-code approach, we can setup the job to trigger the Fsm and run it automatically.

3. Deploy the new Job to the Qorus server by clicking on the cloud icon next to the Job name in the hierarchy view.

  • You cannot run the job until it is deployed in the Qorus server
  • In most cases, both the command-line and the UI can be used for the same tasks.

Running the job through the UI:

  1. Open a browser and navigate to https://localhost:8011 to be greeted by the Qorus dashboard.
  2. Click on the Jobs tab to the left and find the ‘getting-started-hello-world-example-no-code’ job you created earlier.
  3. Hit the Open side pane button to the left of the job’s name.
  4. Click on the run button under controls to run the job.
  5. Go to the Log tab on the side pane to see the log from the job.

Running the job, through command-line:

1. Open terminal on the host machine and run:

qrest put jobs/getting-started-hello-world-example-no-code/run

You should see the following output after successful execution:

hash: (2 members) 
    job_instanceid : 14
    status : “COMPLETE”

2. In the side pane, navigate to the Log tab to view the job’s log.

Creating a Job: A Code Approach

  1. In the interface hierarchy view, click on the New file (create new) icon next to the Job interface.
  2. In the Qorus Webview window, fill out the new job form to configure a new job interface.
  • Target directory: Click on Show folders and select the sub-directory you created earlier. This is where the code generated by Qorus will be saved.
  • Name: getting-started-hello-world-example-code (name of your new Job)
  • Description: Just for logs, getting started hello world! code solution – The description field supports markdown, so feel free to format your text in markdown.
  • Base class name: QorusJob (the abstract base Qorus job class)
  • Class name: GettingStartedHelloWorldExampleCode
  • Schedule:
    • Minute: 0
    • Hour: 1
    • Day: 1
    • Month: 1
    • Weekday: *
  • Version: 1.0
  • Active: false (From the Optional fields drop-down list to the upper-right corner of the job form, click on Active to add it to the job) – Jobs with Active: false are only run on demand; their schedule is ignored
  • Groups: EXAMPLES (From the Optional fields drop-down list to the upper-right corner of the job form, click on Groups to add it to the job)
  • Hit Submit to save the job

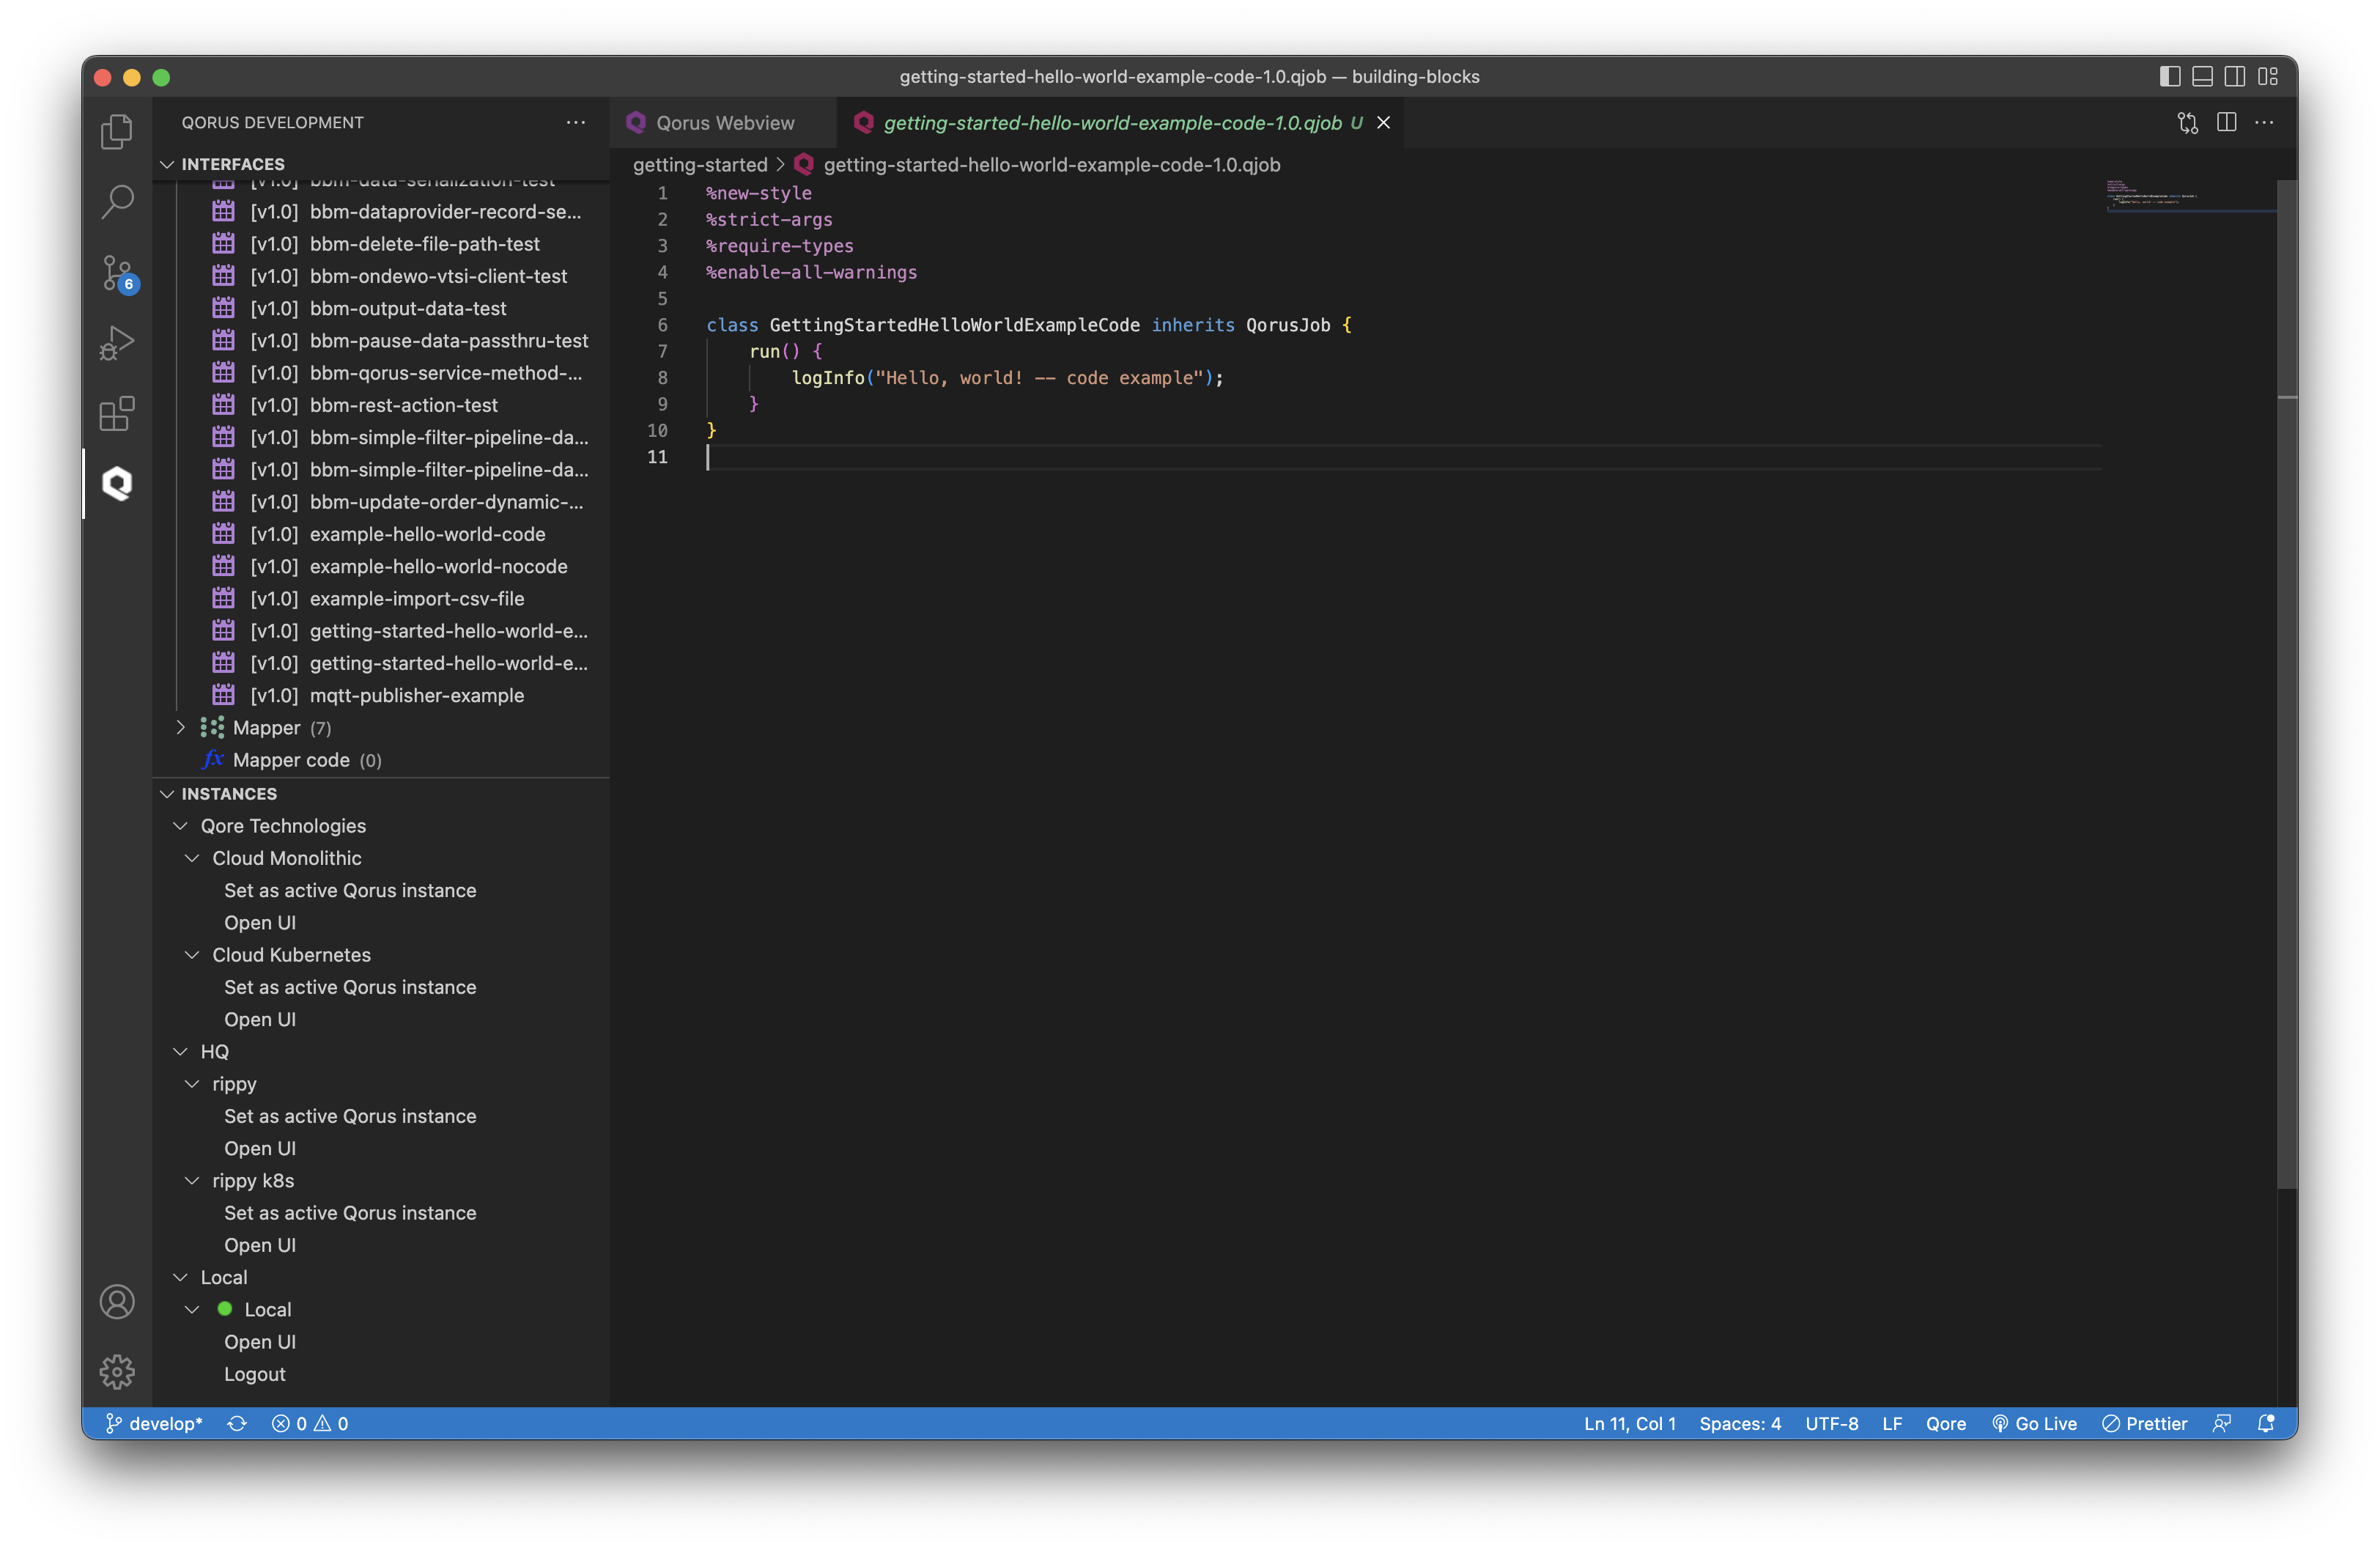
3. Hitting submit will create and open the getting-started-hello-world-example-code-1.0.qjob file.

ℹ️ Note: This file is located in the Target directory specified during the new job interface creation.

4. Add logInfo(“Hello, world! — code example”); to the run() function and save the file.

5. Deploy the new Job to the Qorus server by clicking on the cloud icon next to the Job name in the hierarchy view.

  • You cannot run the job until it is deployed in the Qorus server
  • In most cases, both the command-line and the UI can be used for the same tasks.

Running the job With the UI:

  1. Open a browser and navigate to https://localhost:8011 to be greeted by the Qorus dashboard.
  2. Click on the Jobs tab to the left and find the ‘getting-started-hello-world-example-no-code’ job you created earlier.
  3. Hit the Open side pane button to the left of the job’s name.
  4. Click on the run button under the controls to run the job.
  5. Go to the Log tab on the side pane to see the log for the job.

Running the job With the command-Line:

1. Open terminal on the host machine and run:
qrest put jobs/getting-started-hello-world-example-code/run
2. In the side pane, navigate to the “Log” tab to view the job’s log.

You might’ve observed that the “no-code” version of the example will take more time to implement than the “code” version. However, in more complex real-life cases where a certain IT challenge needs to be solved potentially many times in the future, possibly by developers unfamiliar with the implementation details, using a “no-code” approach will dramatically reduce the time and cost of future maintenance as well as enabling easy reuse of the solution, whereas a pure code-based approach will take more time, will cost more, and will be subject to higher levels of risk.

With Qorus you can code when you need to, and reuse no-code solutions and components when it makes sense.

Grab your FREE application integrations eBook.
You'll quickly learn how to connect your apps and data into robust processes!