- System services – For system services delivered with Qorus
- User services – User services written/configured by Qorus developers
ℹ️ Note: A working example is made available to you in our building-blocks repository. You can find the code files and the metadata files in the examples/create-customer-service directory.
Getting Started
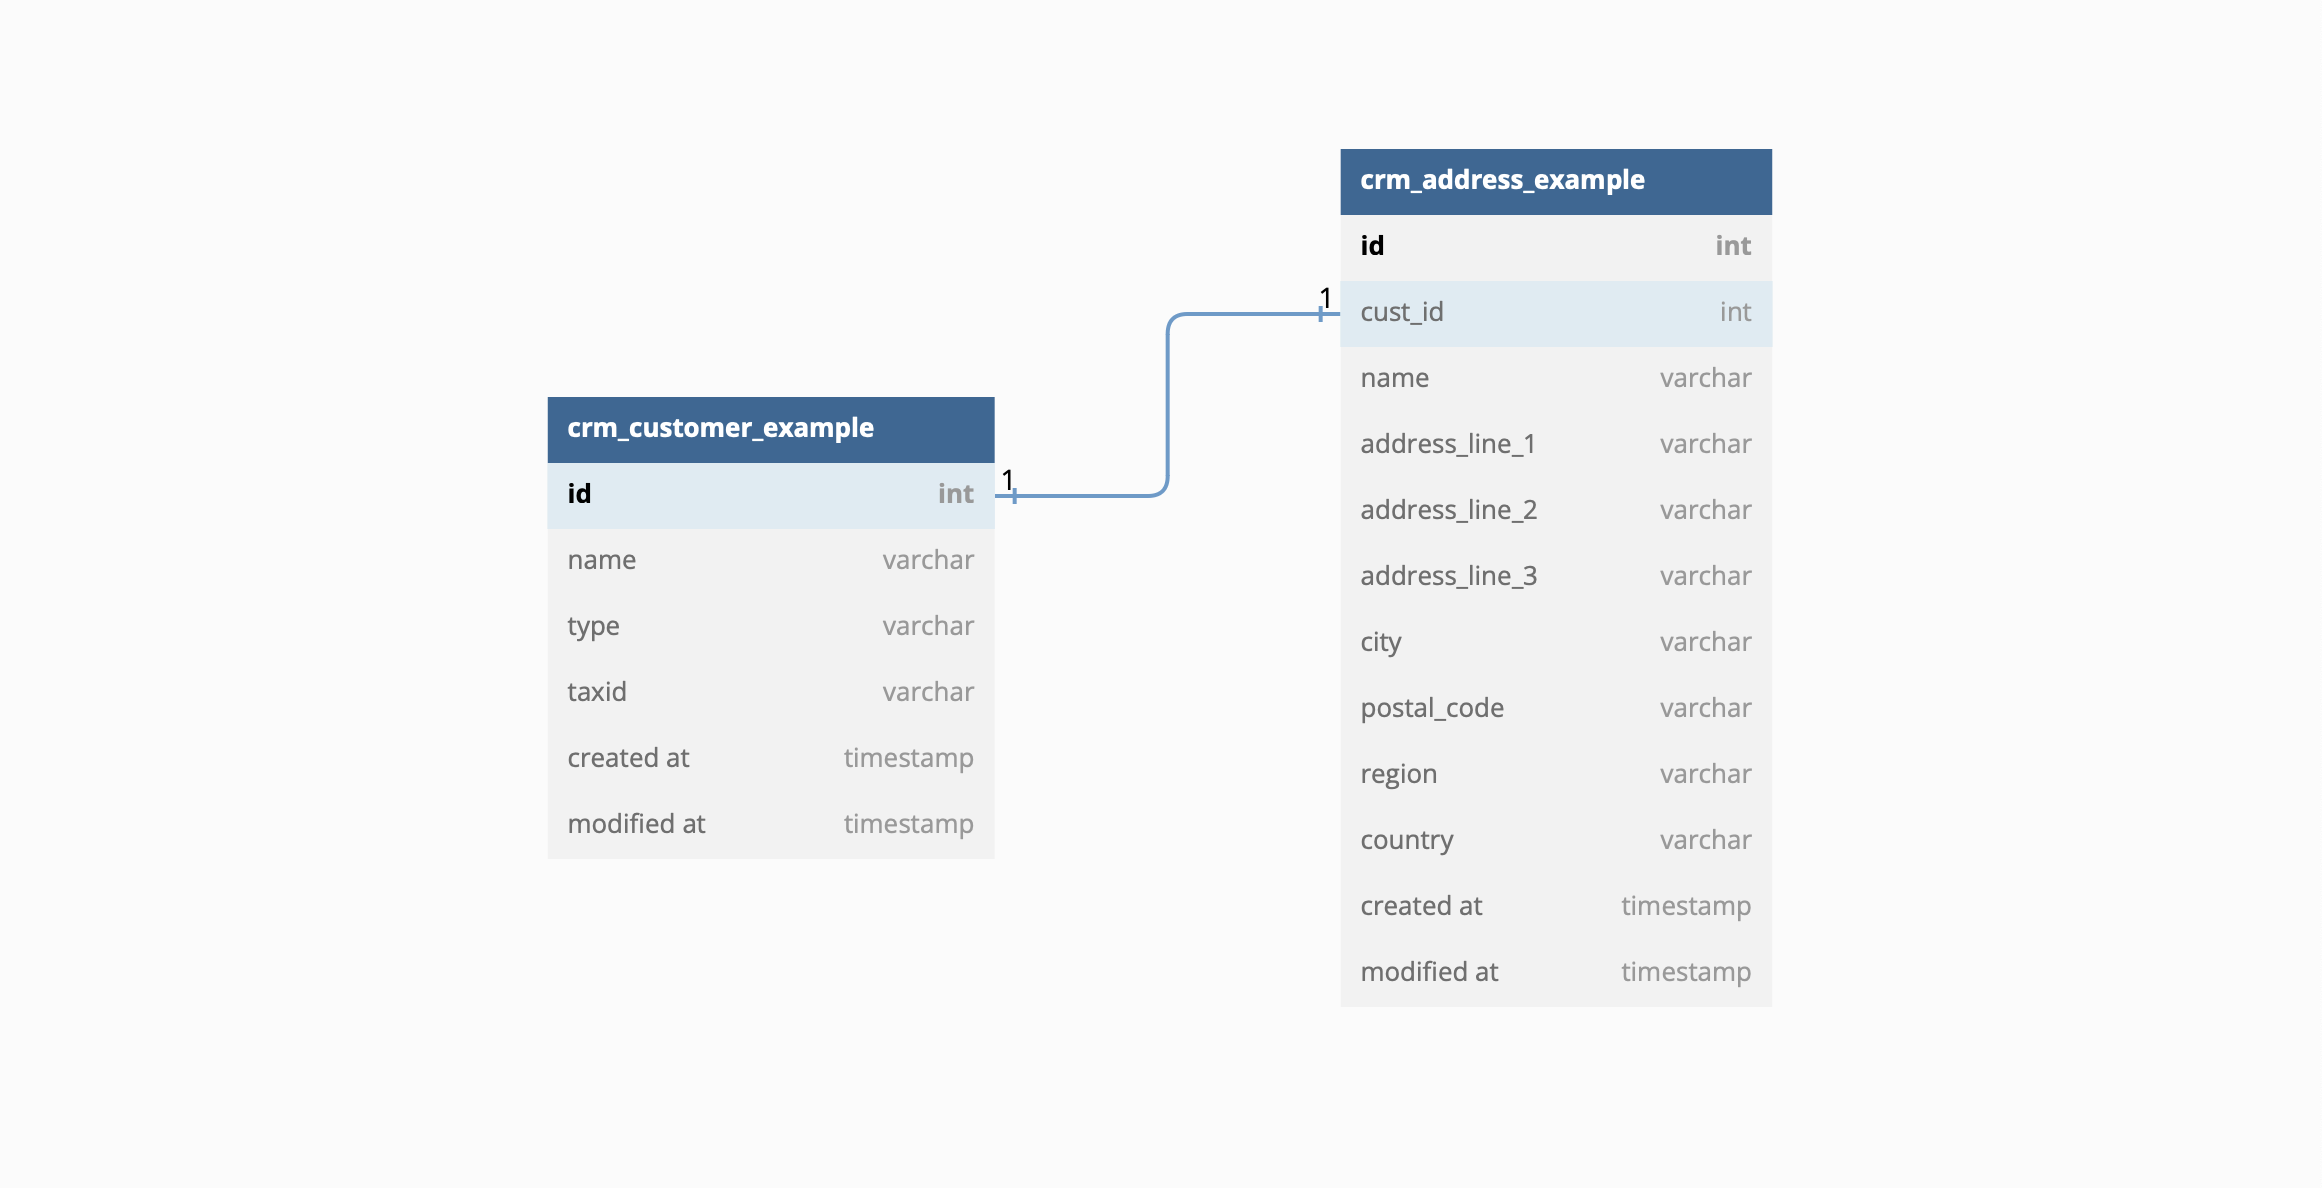
You’ll get started by deploying a DB schema that acts as your playground for CRUD operations. For this example, you’ll create two tables responsible for storing customer records, crm_customer_example and crm_address_example.
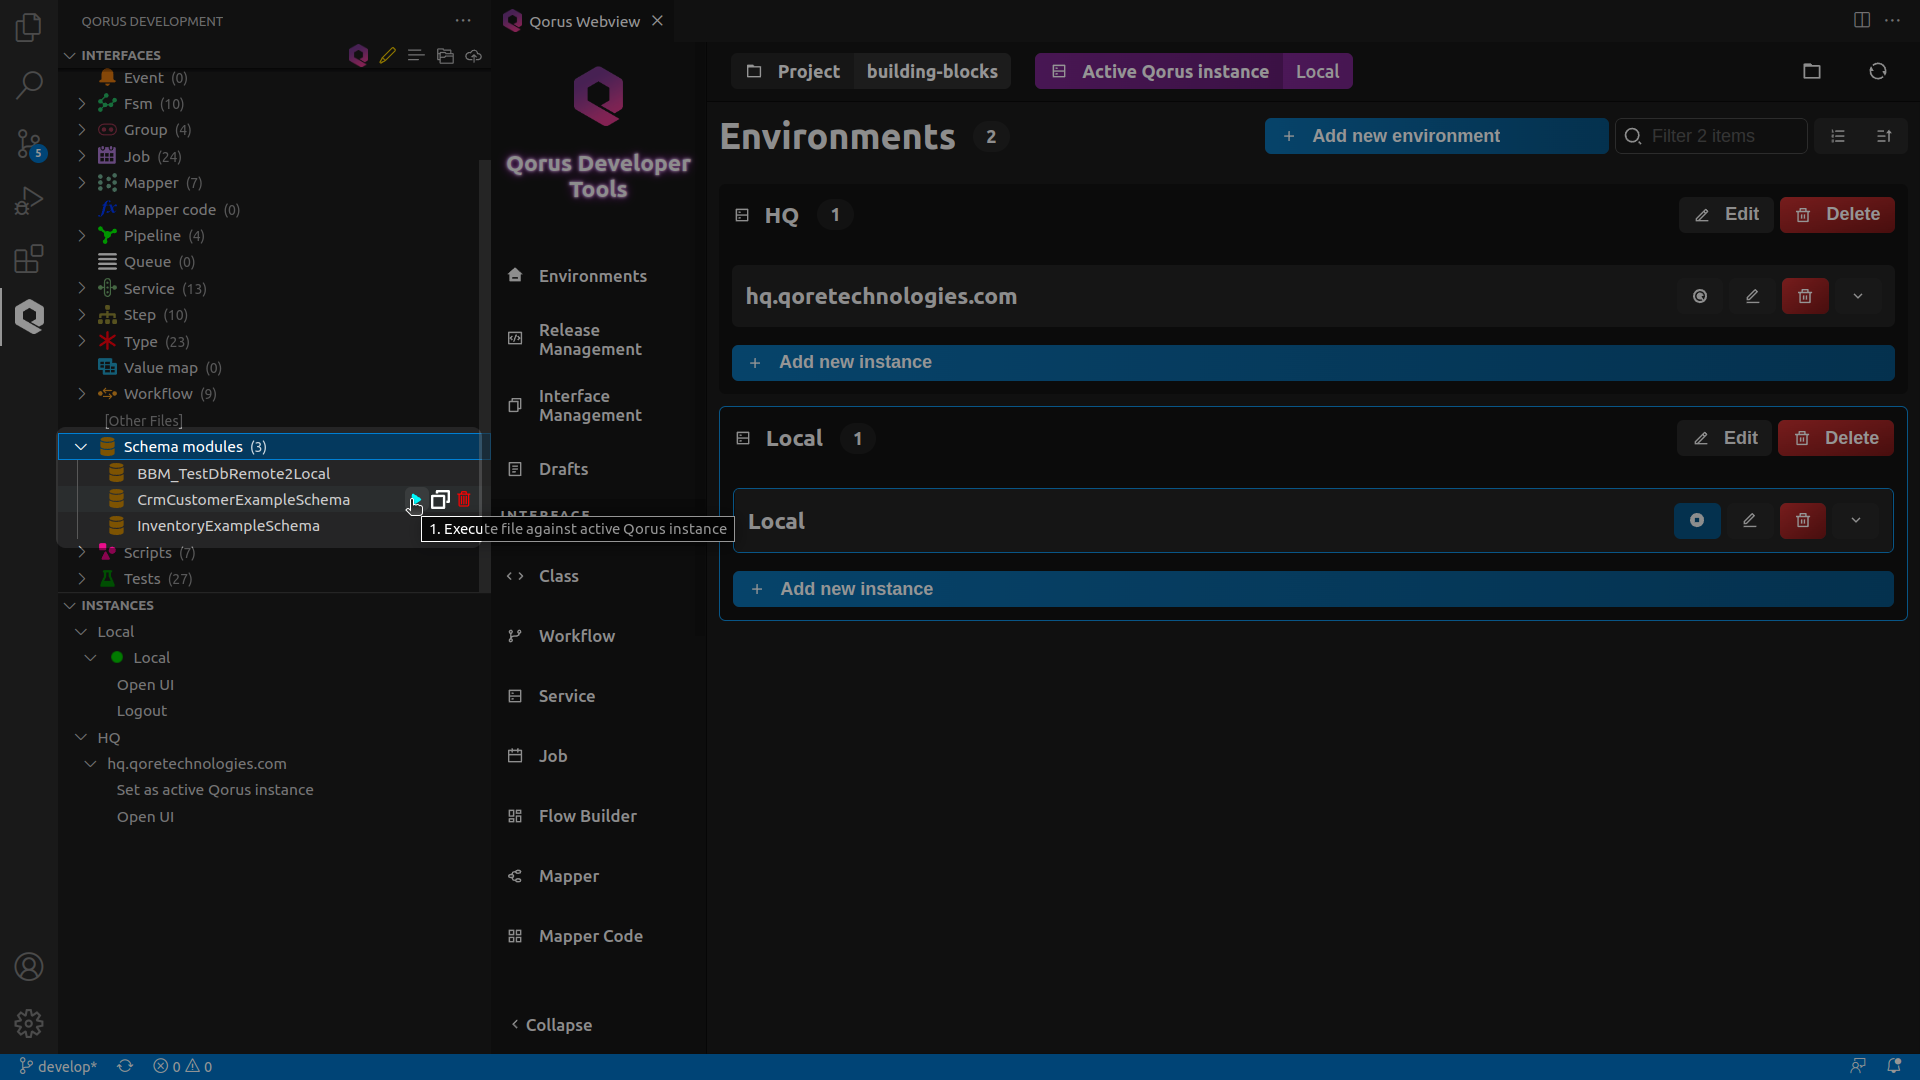
You can deploy the above DB schema by deploying the schema module file, CrmCustomerExampleSchema.qsm in the examples/create-customer-service directory with oload using the Python client.
You should see the following output after a successful deployment
Uploading files to remote host "wss://localhost:8011/": .
processing user schemas: loading qsm file: /tmp/qorus-test-instance/WCXsxaMbOGVd16C/CrmCustomerExampleSchema.qsm
pgsql:postgres@postgres%pg: creating CrmCustomerExampleSchema schema 1.0
31 changes made; schema is now at version 1.0
pgsql:postgres@postgres%pg: user schema "/tmp/qorus-test-instance/WCXsxaMbOGVd16C/CrmCustomerExampleSchema.qsm" is at version 1.0
OK
-- process terminated with exit code 0 --
Creating a Qorus User Service
- Target Directory : Browse through the Show Directories field and select a source directory. This will be the directory where the code and metadata files generated by the interface are stored.
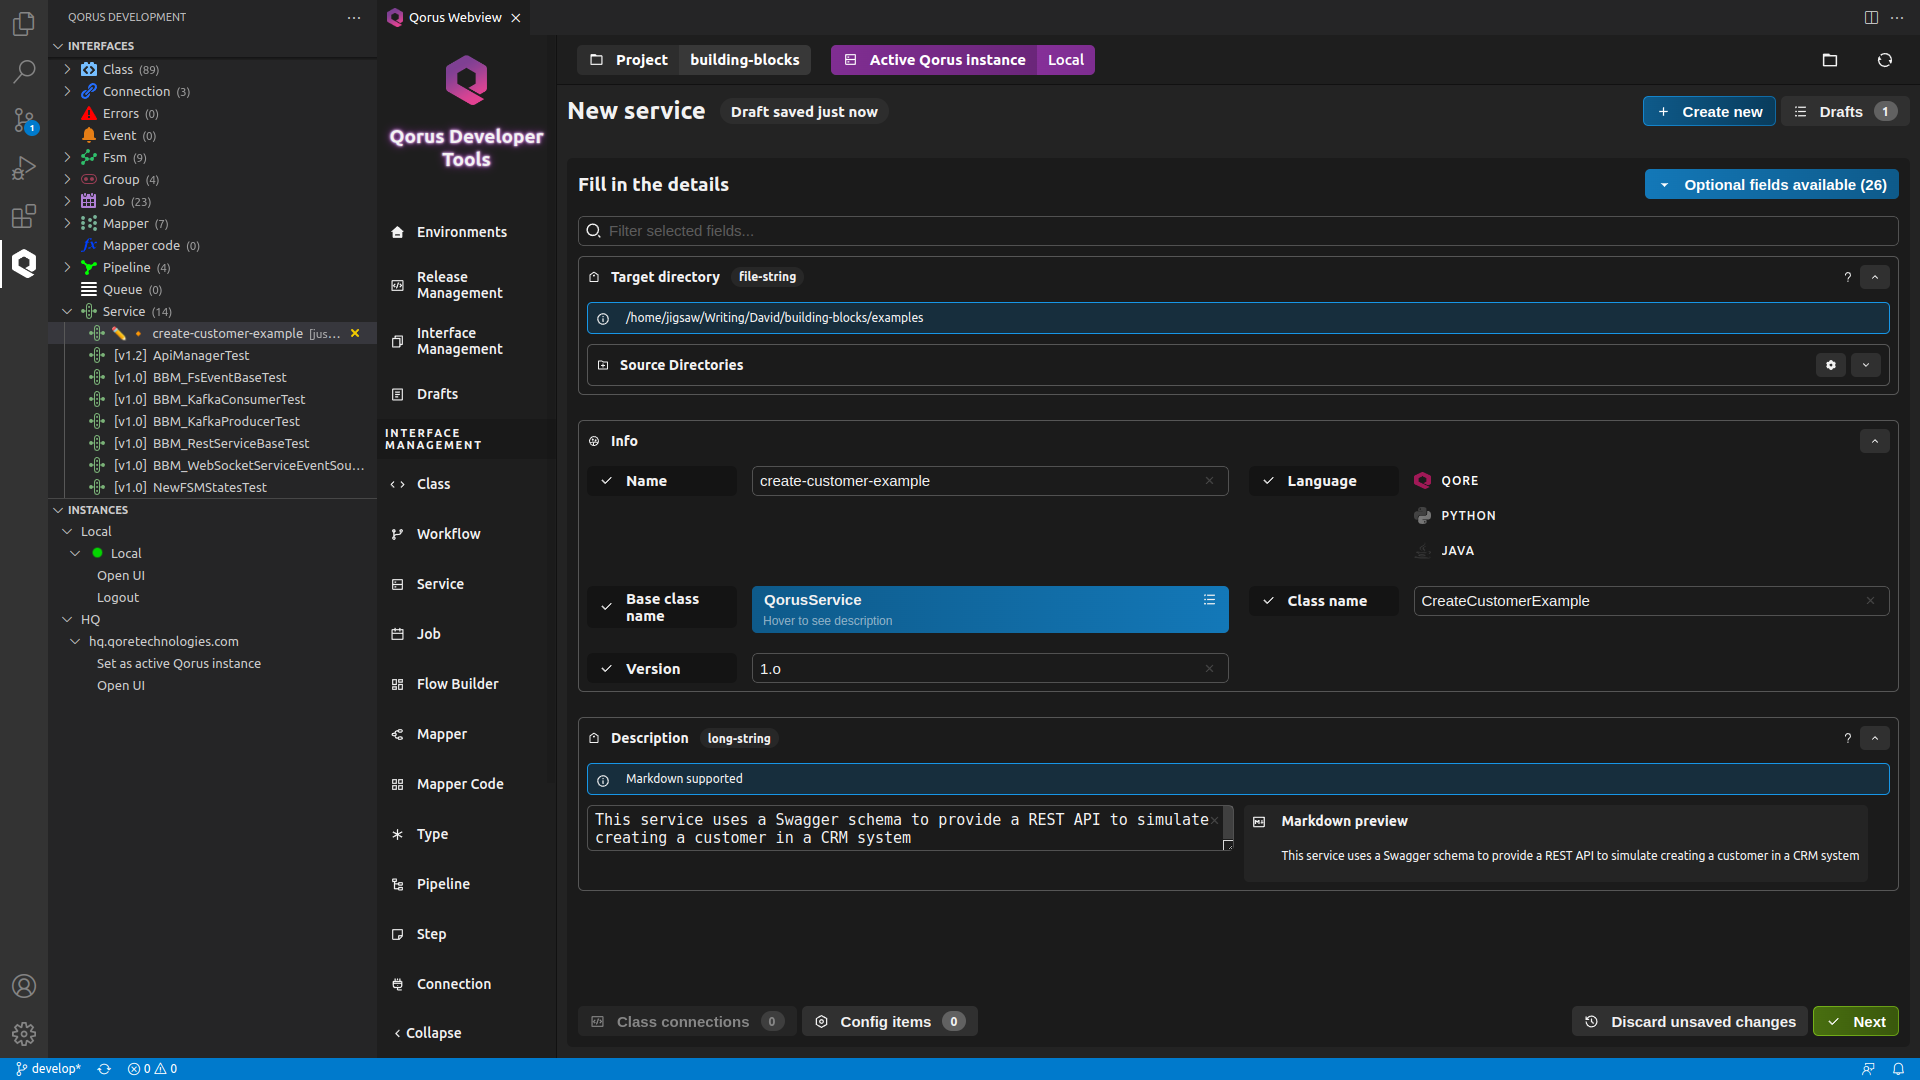
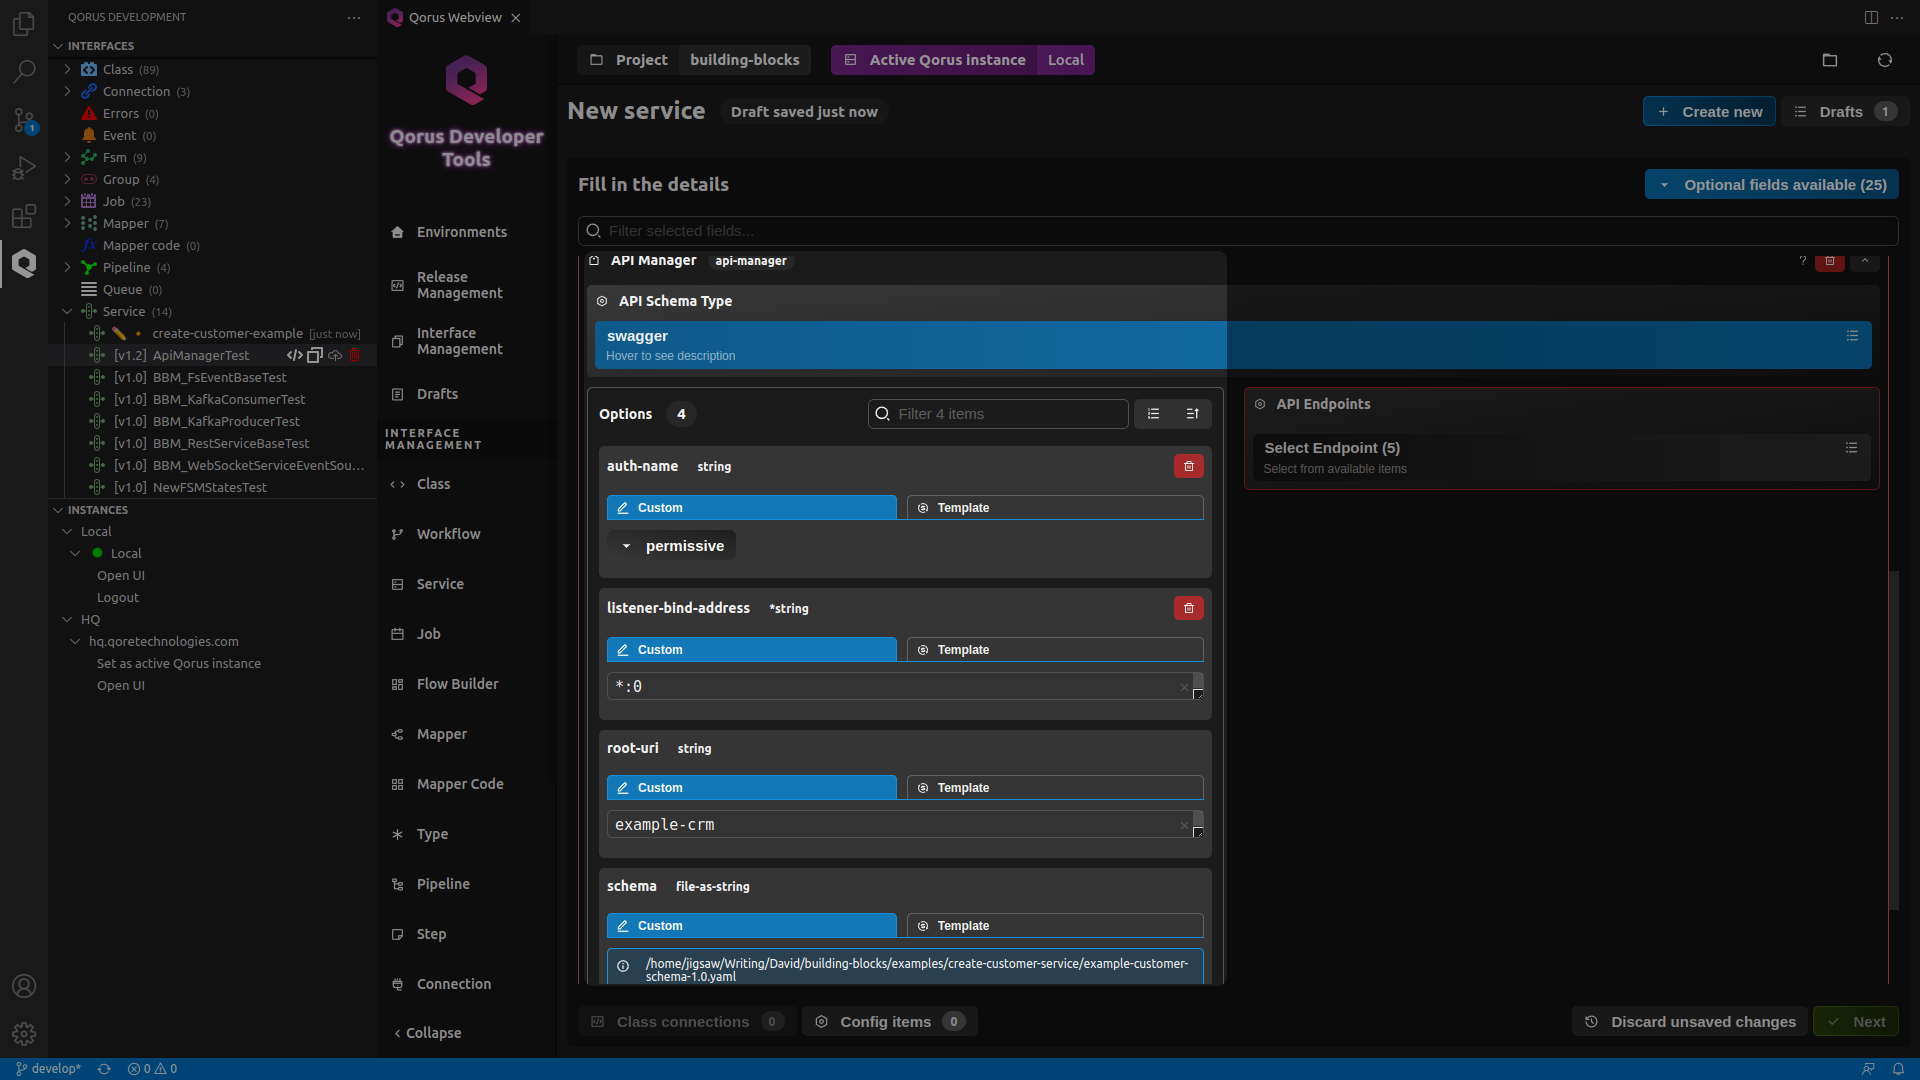
- Name : create-customer-example. This will be the name of your service.
- Click on Please select field next to the Base class name attribute and select QorusService, The base class for Qorus services.
Base class name : QorusService - Version : 1.0
- Description : This service uses a Swagger schema to provide a REST API to simulate creating a customer in a CRM system. The description field supports markdown so, feel free to format your text in Markdown.
- Populate the Custom tab of the root-uri option with example-crm, This will be your root URI path for the API
- Under the Custom tab of the schema option, browse through the Show Directories field and select the swagger schema file, example-customer-schema-1.0.yaml in the examples/create-customer-service directory.
- Click on the Add option button below the options section and add the auth-name option. Under the Custom tab, set the authenticator to permissive.
- Similarly, add the listener-bind-address option and fill the Custom tab with *:0
With this, we tell Qorus to use a random port on all interfaces
ℹ️ Note: API manager configuration has very flexible configuration to configure how the API handler is started, it can be started on all Qorus system listeners, if no bind address is given and various other options can be given as well. Only Qorus Enterprise Edition supports the authentication options, Qorus Community Edition does not support users, permissions, or user-based authentication.
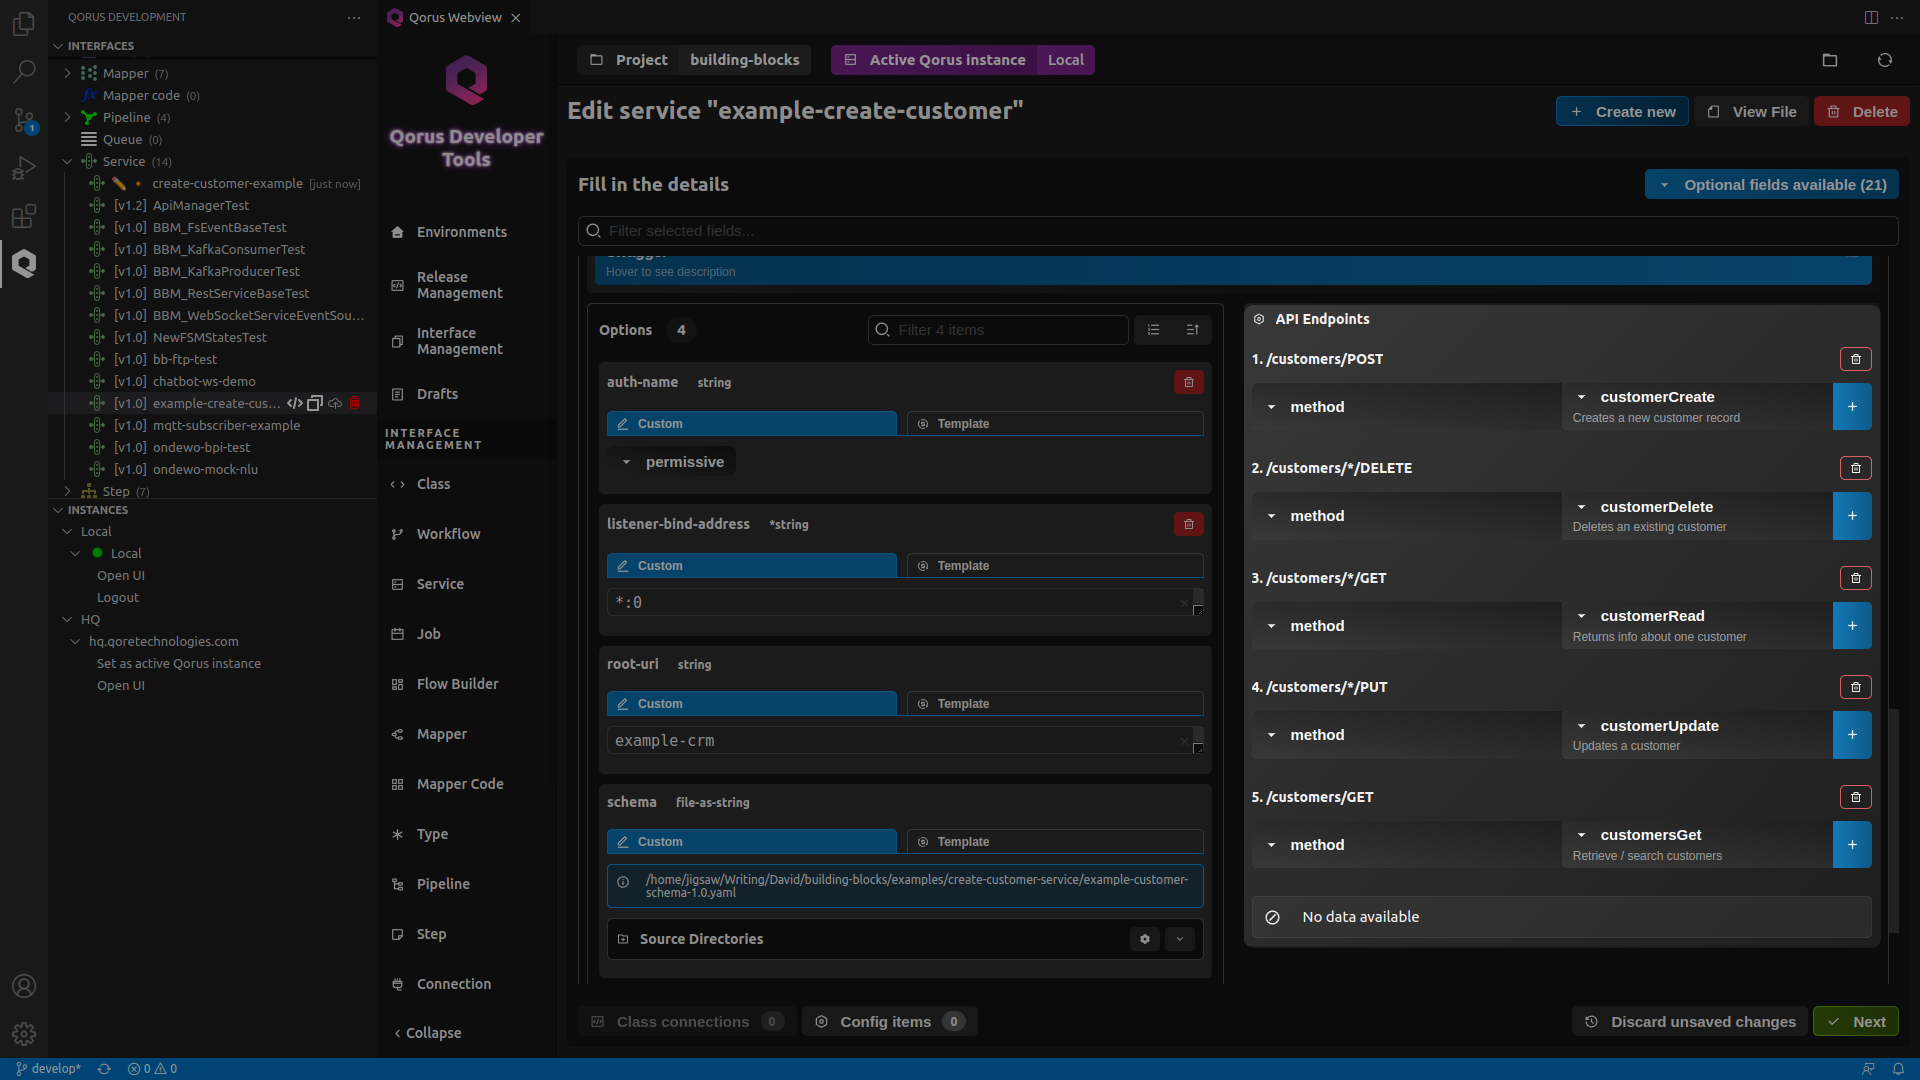
- Under the API Endpoints section, click on the Select Endpoint and add the /customers/POST endpoint and set the type to method.
Click on the Plus button, and fill in the following:
- Name : customerCreate
- Description : Creates a new customer record
- Similarly, Add the following endpoints:
- /customers/*/DELETE
Type : method
Name : customerDelete
Description : Deletes an existing customer
- /customers/*/GET
Type : method
Name : customerRead
Description : Returns info about one customer
- /customers/*/PUT
Type : method
Name : customerUpdate
Description : Updates a customer
- /customers/GET
Type : method
Name : customersGet
Description : Retrieve / search customers
After the submission, the IDE will open the interface’s code file with a CreateCustomerExample class and empty methods for the endpoints you specified earlier. For this example, you can copy the logic from the example-create-customer-1.0.qsd file in the examples/create-customer-service directory.
ℹ️ Note: The contents of example-create-customer-1.0.qsd are written using the Qore language, however, Qorus provides the flexibility to choose between Qore, Java and Python. Make sure to set your preferred language during the interface configuration in the language field.
ℹ️ Note: You can achieve the same by deploying the example-create-customer-1.0.qsd.yaml file to the server with oload using the Python client or by deploying the example-create-customer service.
When using API managers in Qorus services, the request type is the input type for the API, and the response type is the output type. When a service method is associated to an API endpoint, the parameter types to the service method must correspond to the request type.
For OpenAPI / Swagger APIs, request arguments are passed as a hash, with each hash key corresponding to a declared argument. The return value of the method must correspond to the type specified in the schema. When an FSM is used to serve an API endpoint, then the same data is passed to the FSM and expected as output; and any FSM created from the IDE will have these types specified in the FSM as well.
Getting the Service's Port Number
Since you’ve set *:0 as your listener-bind-address, the service binds on a random port every time it’s started, also multiple listeners may be started due to this bind option.
To get the port the listener is bound on, call:
qrest put services/example-create-customer/getPort/call
43573
-- process terminated with exit code 0 --
qrest services/example-create-customer/resources
hash: (1 member)
svc-example-create-customer-2-svc-example-create-customer-1 : hash: (3 members)
type : "HttpListener"
desc : "listening on ipv4(0.0.0.0):43573 (dedicated)"
info : hash: (19 members)
content : <NOTHING>
headers : <NOTHING>
name : "svc-example-create-customer-2"
hostname : "0.0.0.0"
hostname_desc : "ipv4(0.0.0.0)"
address : "0.0.0.0"
address_desc : "ipv4(0.0.0.0)"
port : 43573
family : 2
familystr : "ipv4"
ssl : False
id : 2
desc : "ipv4(0.0.0.0):43573"
proto : "http"
bind : "0.0.0.0:0"
get_remote_certs : False
ssl_verify_flags : list: (1 element)
[0]="SSL_VERIFY_NONE"
ssl_accept_all_certs : True
url : "http://[YOUR-IP]:43573"
-- process terminated with exit code 0 --
Performing the CRUD Operations Manually
qrest post http://localhost:[PORT]/example-crm/customers '{Name=test,Type=new,TaxId="1234567",Address={Name=test customer,AddressLine1=10 Main Street,City=Prague,PostalCode=130 00,Country=CZ}}'
qrest http://localhost:[PORT]/example-crm/customers?limit=[number-of-records]
ℹ️ Note: Replace “[number-of-records]” with the number of records you want to see in the response. i.e., qrest http://localhost:[PORT]/example-crm/customers?limit=1 will include a single customer record in the response.
qrest http://localhost:[PORT]/example-crm/customer/1
qrest put http://localhost:[PORT]/example-crm/customers/1 Type=STANDARD
qrest delete http://localhost:[PORT]/example-crm/customers/1
Getting Information About APIs In Qorus
qdp swagger'{schema=resource://example-create-customer:example-customer-schema-1.0.yaml}'
["customers"]
ℹ️ Note: This uses the swagger Data Provider factory to provide information about the APIs implemented in the schema, which can be accessed using the special location scheme. In the above example, we use the resource:// scheme.
qdp swagger'{schema=resource://example-create-customer:example-customer-schema-1.0.yaml}'/customers/GET response
softlist<hash<auto>> body: elements ->
*softint Id
softstring Name
softstring Type
softstring TaxId
hash<auto> Address
softstring Name
softstring AddressLine1
*softstring AddressLine2
*softstring AddressLine3
softstring City
*softstring PostalCode
*softstring Region
softstring Country
qdp swagger'{schema=resource://example-create-customer:example-customer-schema-1.0.yaml}'/customers/POST request
hash<auto> body
*softint Id
softstring Name
softstring Type
softstring TaxId
hash<auto> Address
softstring Name
softstring AddressLine1
*softstring AddressLine2
*softstring AddressLine3
softstring City
*softstring PostalCode
*softstring Region
softstring Country
qdp -h
Testing the Solution
You can test the solution you’ve developed so far by running the example-create-customer.qtest test file in the examples/create-customer-service directory. Go to the Qorus IDE and in the interface hierarchy view, under the Tests file type, find the example-create-customer test. Run the test by clicking on the play button next to it.
You should see the following output after a successful test in VS Code at View → Output → Qorus Remote Development
Files to test:
examples/create-customer-service/example-create-customer.qtest
Execution to Local - https://localhost:8011/ has started ...
options: {"continue-on-error":false}
... response: {"id":3,"href":"api/latest/development/test/3"}
uri https://localhost:8011/api/latest/development/test/3
1s checking execution progress (ID: 3) ...
2s checking execution progress (ID: 3) ...
... response: QUnit Test "example-create-customer" v<latest>
Ran 1 test case, 1 succeeded (5 assertions)
... status: FINISHED
Execution finished successfully (ID: 3)