In this blog post, you’ll learn about the Qorus IDE and how to use it. After you understand the steps involved in the development process, you can look at how to use the IDE to accomplish each step.
- Managing and connecting to a Qorus server
- Managing source directories
- Creating and configuring components
- Deploying components and managing releases
- Deleting components and their functionalities
1. Managing and connecting to a Qorus Server
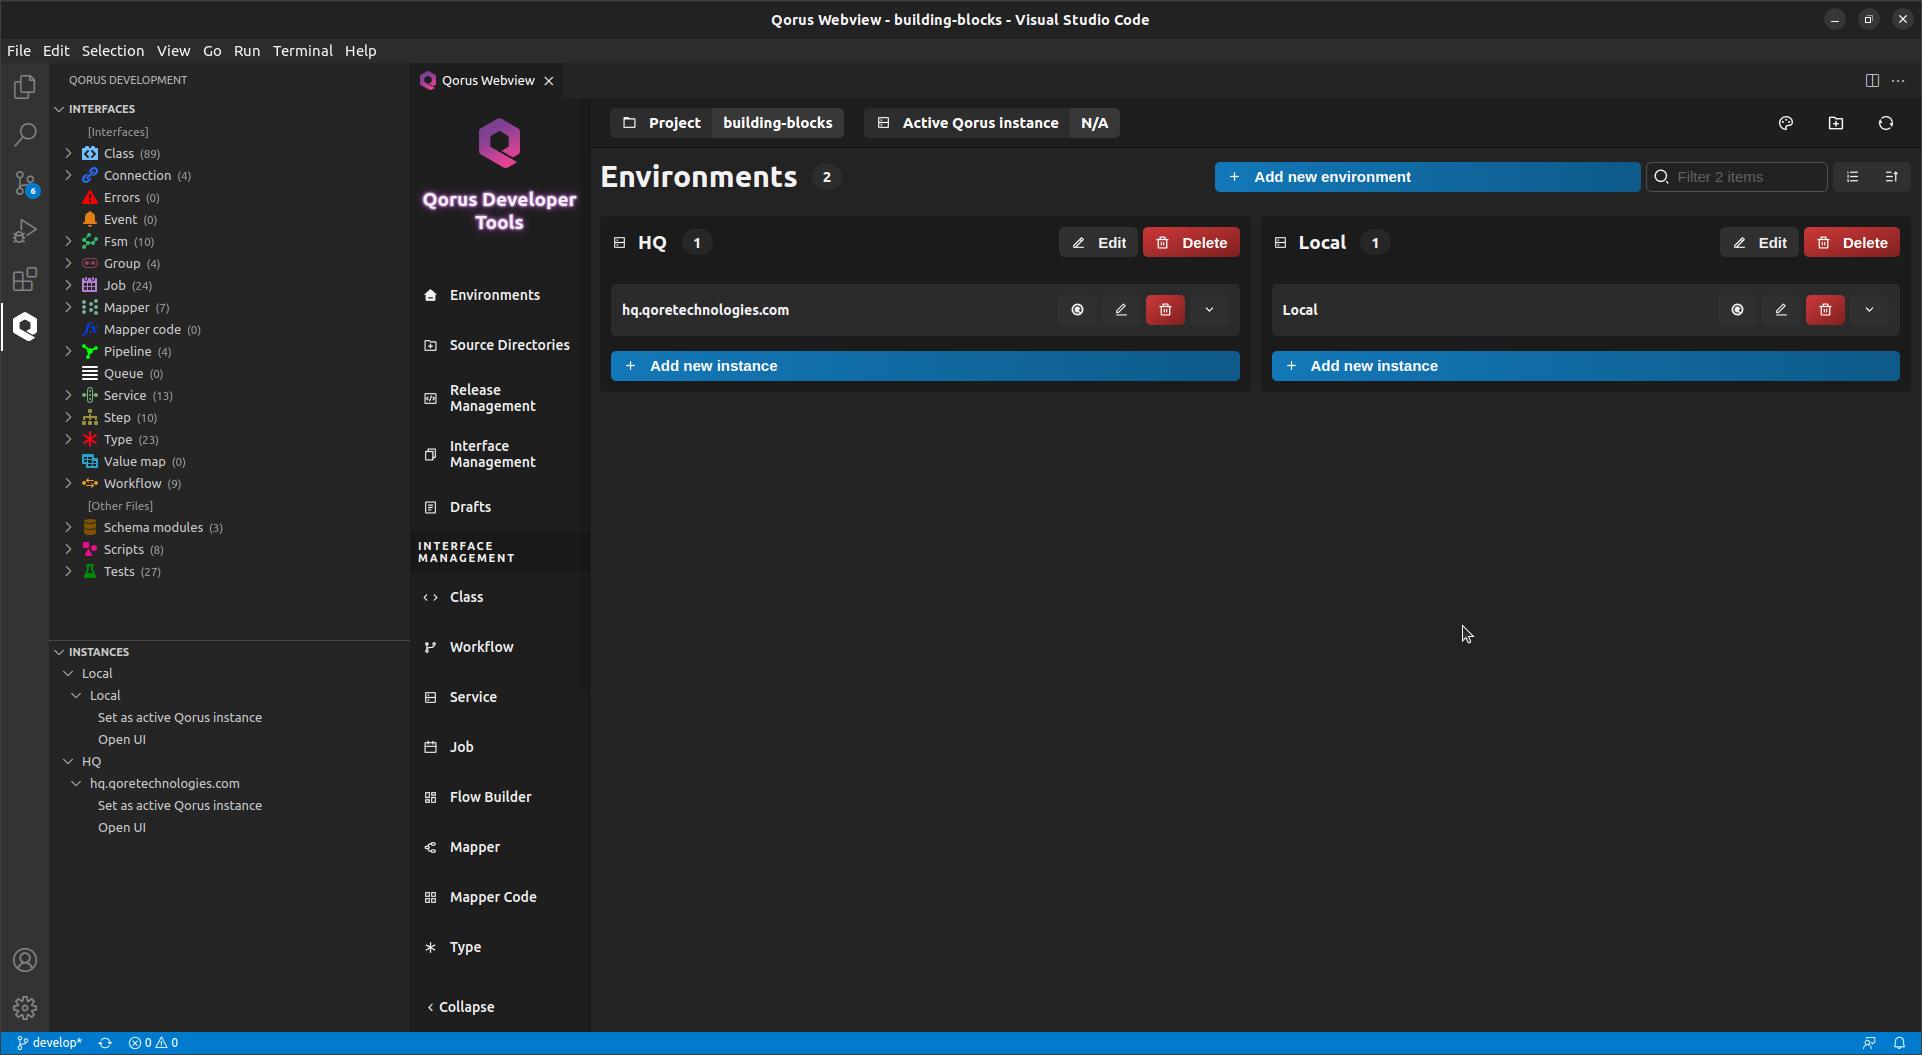
All of Qorus server connections are managed in the IDE. To access the IDEs main menu, click on the Qorus Developer Tools Extension, then click on the purple “Q” icon . Qorus divides all of its server instances into groups called environments.
The main menu’s UI lets you manage environments and also lets you manage Qorus server instances in an environment.
- Clicking on the “+ Add new environment” button creates a new environment.
- You can add a new server instance by clicking the “+ Add new instance” button at the bottom of an environment.
- You can connect to a Qorus server by clicking on the login button next to the name of the server.
- Furthermore, you can edit and delete environments and server instances by clicking on the edit and delete buttons.
ℹ️ Note: Opening the Webview will initialise the qorusproject.json file at the root directory of the project. qorusproject.json contains all of the configuration data for the IDE. The credentials required for Qorus server connections are also written to the qorusproject.json file and are stored with simple encryption. It’s recommended to avoid storing server credentials in the IDE if other users can access it.
2. Source Directories
Qorus organizes objects through sub-directories called source directories, this is where the code generated by Qorus is saved. The IDE will only display Qorus objects that are stored in the source directories.
If a directory is not listed in the source directories, the IDE won’t be able to work with the data as Qorus objects. You can create subdirectories and add them as source directories by clicking the Manage source directories button in the IDEs main menu.
3. creating and configuring components
Qorus is a no-code solution because it gives users/developers prebuilt and well-defined components that they can use to create integration/automation solutions. In the IDE, these components/objects are in the interface hierarchy view to the left of the Qorus Webview window. Below is a brief overview of these objects and their role.
| Qorus Objects/Components | Description |
|---|---|
| Class | Class objects are the fundamental building block element of Qorus. In the Qorus schema, class objects can be used by other integration objects, such as workflows, services, jobs, mappers, or even other class objects |
| Connection | Connection object allows for remote system connections. They provision User, Datasoruce and Qorus to Qorus connections |
| Errors | By default, Error definitions are global. A global definition is a workflow error definition that applies to all workflows. Workflow-specific error definitions apply only to a particular workflow configuration |
| Event | Workflow synchronisation event objects are required for workflow synchronisation event steps. |
| Fsm | Finite State Machines allow arbitrary logic to be configured and deployed by connecting integration objects. When existing building blocks are sufficient to cover the implementation requirements, Finite State Machines support complete no-code solutions |
| Group | Group interfaces contain a list of workflows, user services, jobs, mappers, value maps, finite state machines, and data pipelines; groups can be enabled and disabled, and roles can have a list of groups they can access |
| Job | Jobs are simple tasks executed on a schedule, similar to a cron job |
| Mapper | Mappers are a data transformation objects |
| Mapper code | Mapper code objects are used in a mapper |
| pipeline | Data pipelines allow for complex and efficient processing of record-based data from a single input to an arbitrary number of outputs in an arbitrary number of processing queues |
| Queue | Queues provide the storage and delivery mechanism by which the results of executing an asynchronous event for an asynchronous step are delivered to the right step instance |
| Service | User services are like named and versioned API sets that can be live-upgraded |
| Step | Steps are the atomic elements of a workflow |
| Type | The IDE provides an interface to make Data Provider types - these types can be used in various places in Qorus to describe data types for connector input and outputs, mapper inputs and outputs, etc. |
| Value map | Value maps objects are data lookup maps |
| Workflow | Workflows stateful IT orchestration / automation object with automatic recovery from technical errors |
Just as Files
Just as Files
There are three file types supported just as files – no form-based metadata or YAML files are supported in the IDE. These objects can be found under the Other Files in the hierarchy:
| File Type | Description |
|---|---|
| User schema modules | User schema module files allow Qorus developers to manage user schemas automatically by provided a user schema module file describing the schema |
| Scripts | Custom release scripts allow Qorus developers to perform fine-tuned release tasks. |
| Tests | Test files allow for the testing of Qorus objects and releases. Tests can be written in Python, Java, and Qore. |
Components/Interface Creation and Configuration
You can create an interface by clicking the “Create new” ( new file ) icon next to the interface in the interface hierarchy view of the IDE. Qorus interface objects are configured by metadata represented in YAML. The IDE provides a user interface in a form-like fashion in the Qorus Webview window that can be populated with configuration data. Qorus then uses this data to generate metadata files.
The form to configure Qorus objects contains various fields, few of which are specific to an object, while others are shared among various objects. Some of the common attributes shared by Qorus objects include:
| Field | Description |
|---|---|
| Target directory | The target directory is the directory where the code and metadata files that Qorus creates are stored. Target directories can only be set with source directories. Objects with code have at least two files, whereas 'pure configuration' objects have only one YAML file. |
| Name | The name field specifies the object's name. |
| Description | You can document the function of the object you are creating with the description field. Description fields support markdown for nice-looking documentation. |
| Target file (optional) | The target file field specifies the name of the file the code will be saved as. |

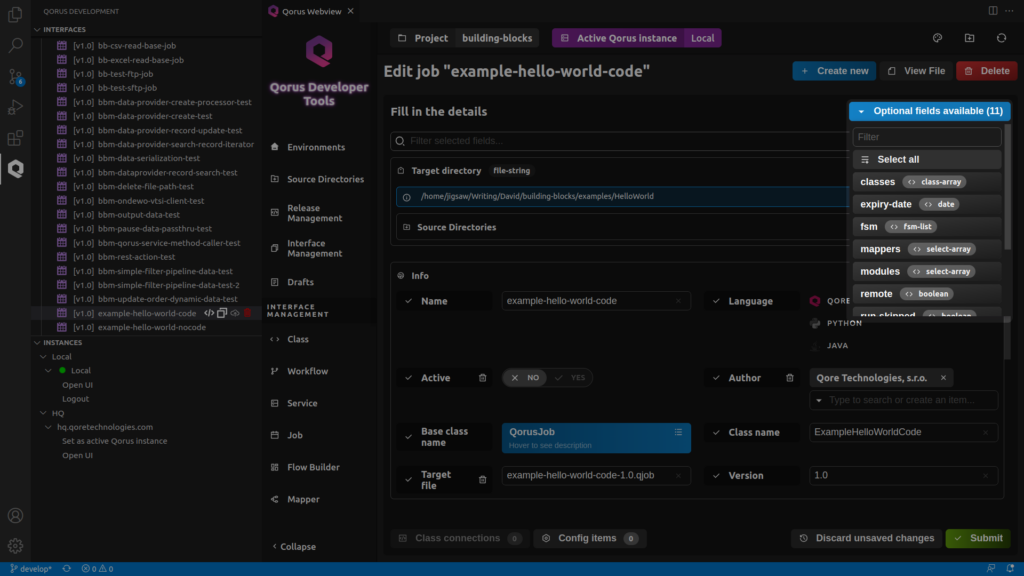
Some objects might require additional attributes to accomplish certain functionalities. In such a case, the default fields available for the object in the new object creation form may not be adequate. Such attributes can be found in the Optional fields drop-down list placed at the upper-right corner of the object’s form
Optional Fields Drop-down
This drop-down list contains all the extra fields that an object might need to be configured further. Clicking on any field in the Optional fields drop-down list will add it to the object configuration form.
Few fields that are commonly added from the Optional fields list are:
i. Author
II. Tags
- classpath – The classpath tag can be used to define the classpath for Java code.
- module_path – The module_path tag can be used to define the module path for Python code.
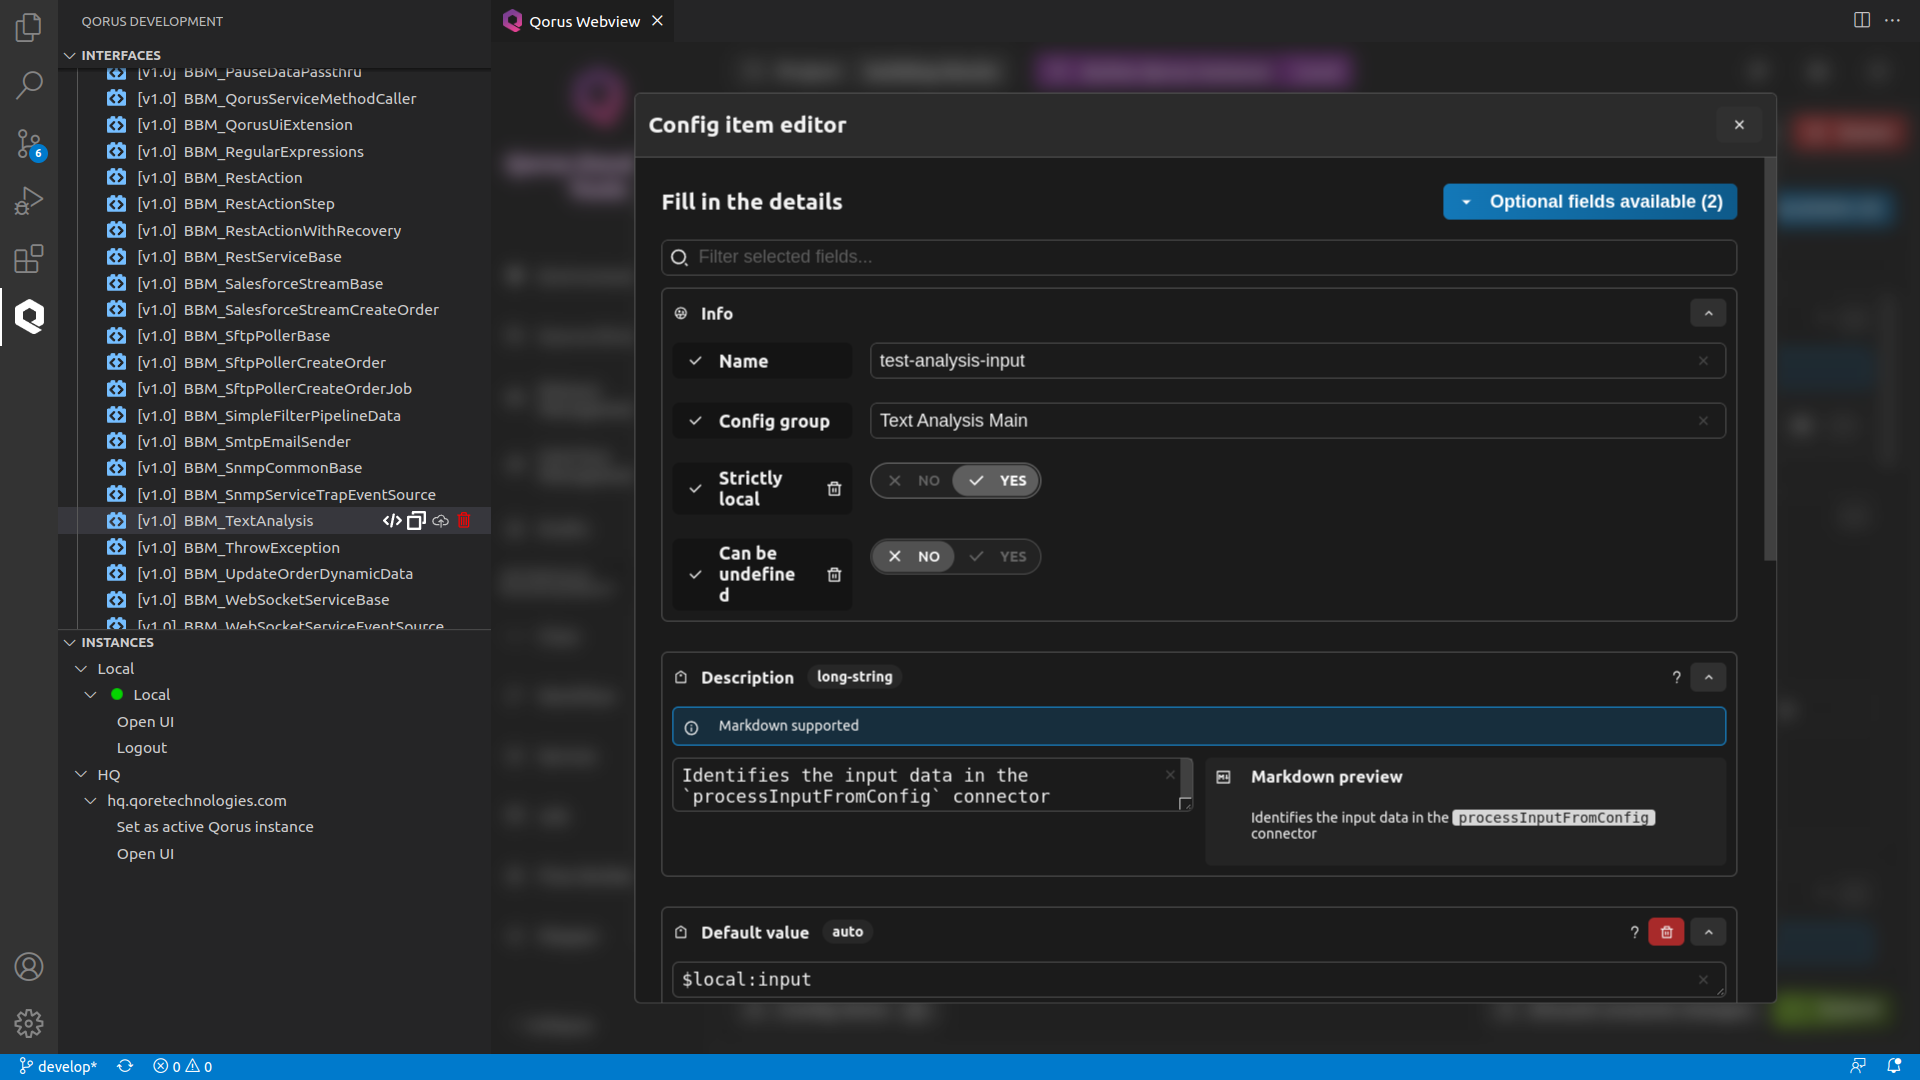
Config Items
The primary way to package code in a reusable, self-documenting object in Qorus is to implement the code in an object that supports config items, therefore config items are one of the main vehicles for enabling developers to package their code as self-documenting no-code objects.
Config items are provided as metadata in supported objects and allow users to control the behavior of the object’s code at runtime. Because objects that support config items also support builtin documentation in the form of markdown description fields, this enables objects supporting a combination of code and config items to be reusable and self-documenting.
ℹ️ Note: Config items are supported by Class, Job, Service, Step and Workflow objects. When configuring these objects, you can set config items by clicking on the “Config items” button at the bottom.
Drafts for unfinished interfaces/components
Any changes you make to the new interface creation form will cause the IDE to save the component to the Drafts as an unfinished interface. The Drafts menu can be accessed by clicking on the “Hamburger” menu icon in the side bar of the Qorus Webview window.
In the IDEs Draft menu, unfinished interfaces are grouped by type. Drafts can be deleted by clicking on the ‘X‘ icon next to its name in the hierarchy view or by clicking on the ‘Trash can‘ icon next to the draft in the Drafts menu.
Submitting Interfaces/Components
After filling all the required fields in the new interface creation form in the IDE, you can submit the interface by clicking on the Submit button at the end of the Create interface menu. The interface’s code files and YAML Metadata files will be generated by Qorus in the Target directory when submitted.
ℹ️Note: Submit generally saves the object you are working on – if the object has associated code, then, if you are creating or editing the object from the hierarchy view (as opposed to editing an object referenced from another object), then the IDE will generally take you to the code view
4. Deploying components and Managing Releases
Deploying Components
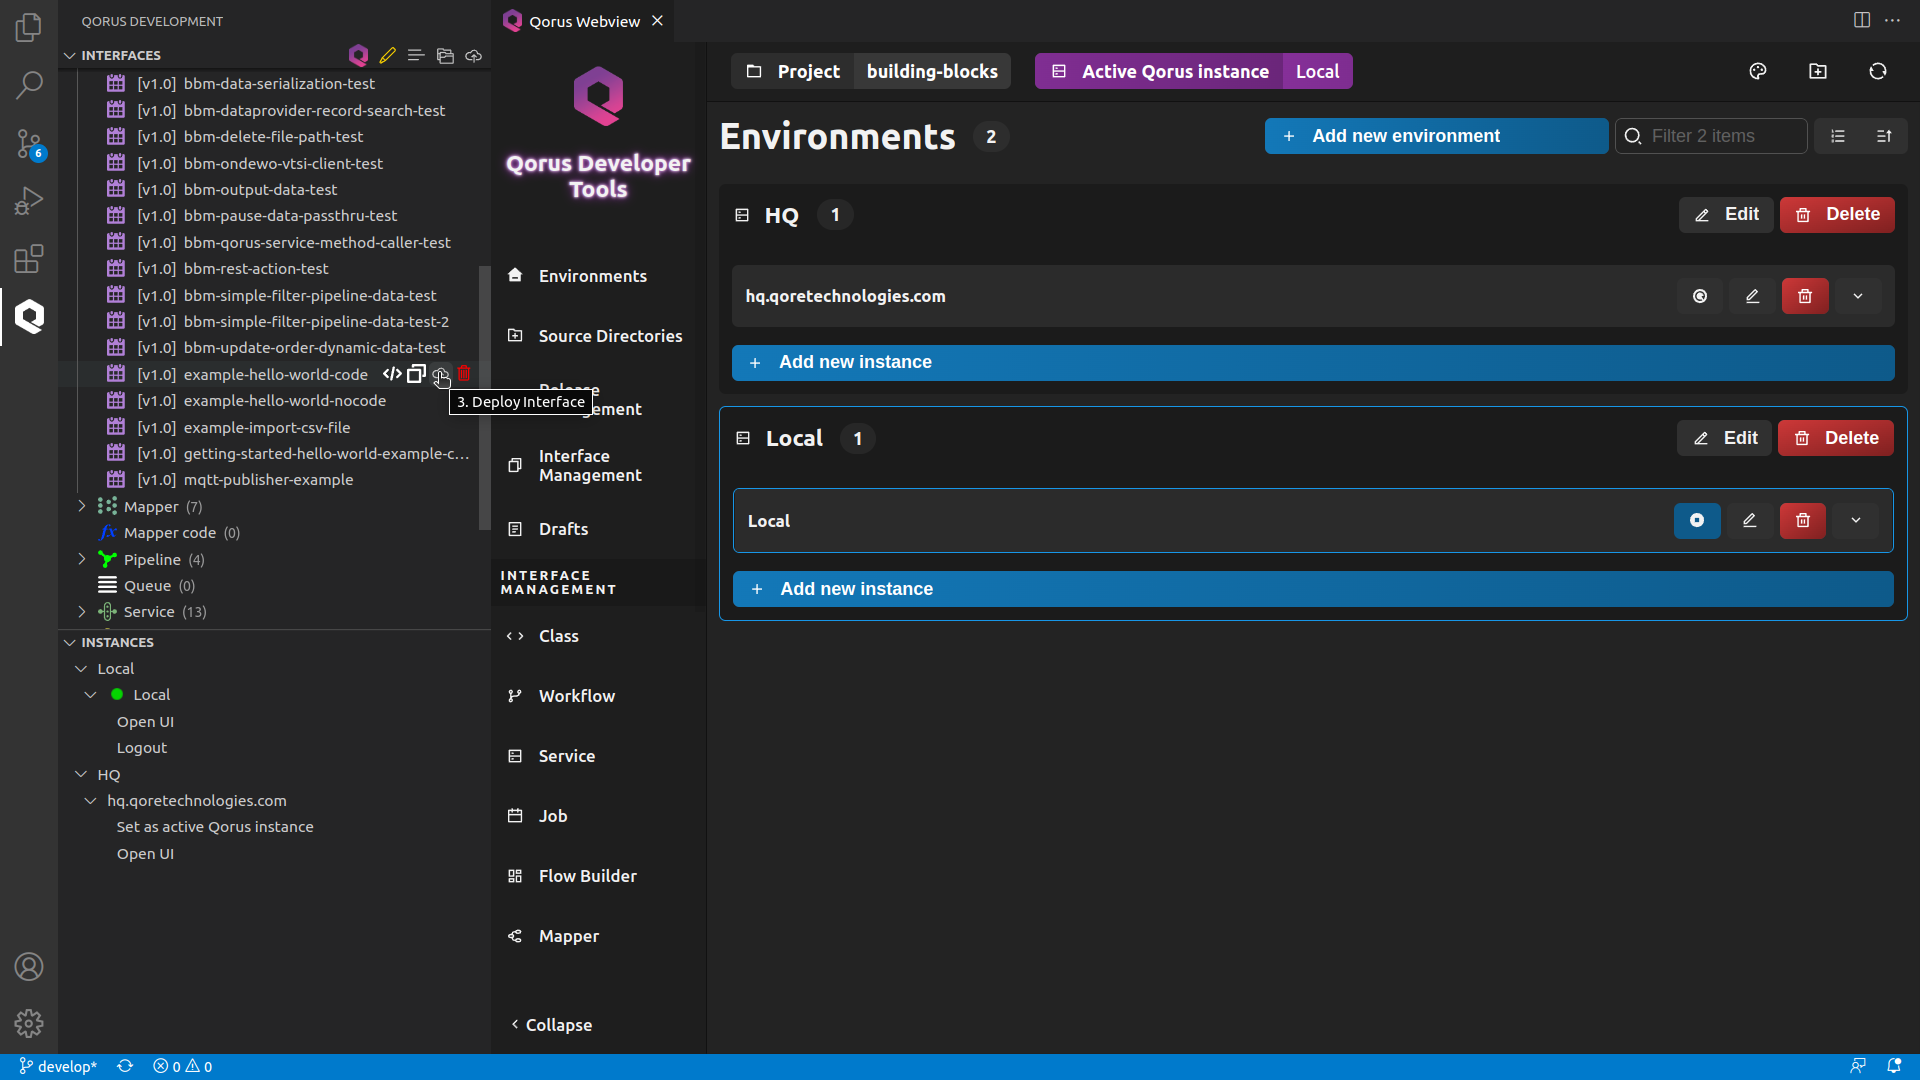
After configuring and submitting the interface, the interface objects must be deployed to the Qorus server. In the IDE, you can do this by clicking the cloud icon next to the name of the interface you want to deploy.
Note that some objects must be deployed to the server before they are visible in the IDE as reference data. This is because the IDE queries the server for data instead of searching locally, and this is particularly true for objects like workflows, services, jobs, mappers, and connections, which are shown as possible values for configuration items of those types.
Managing Releases
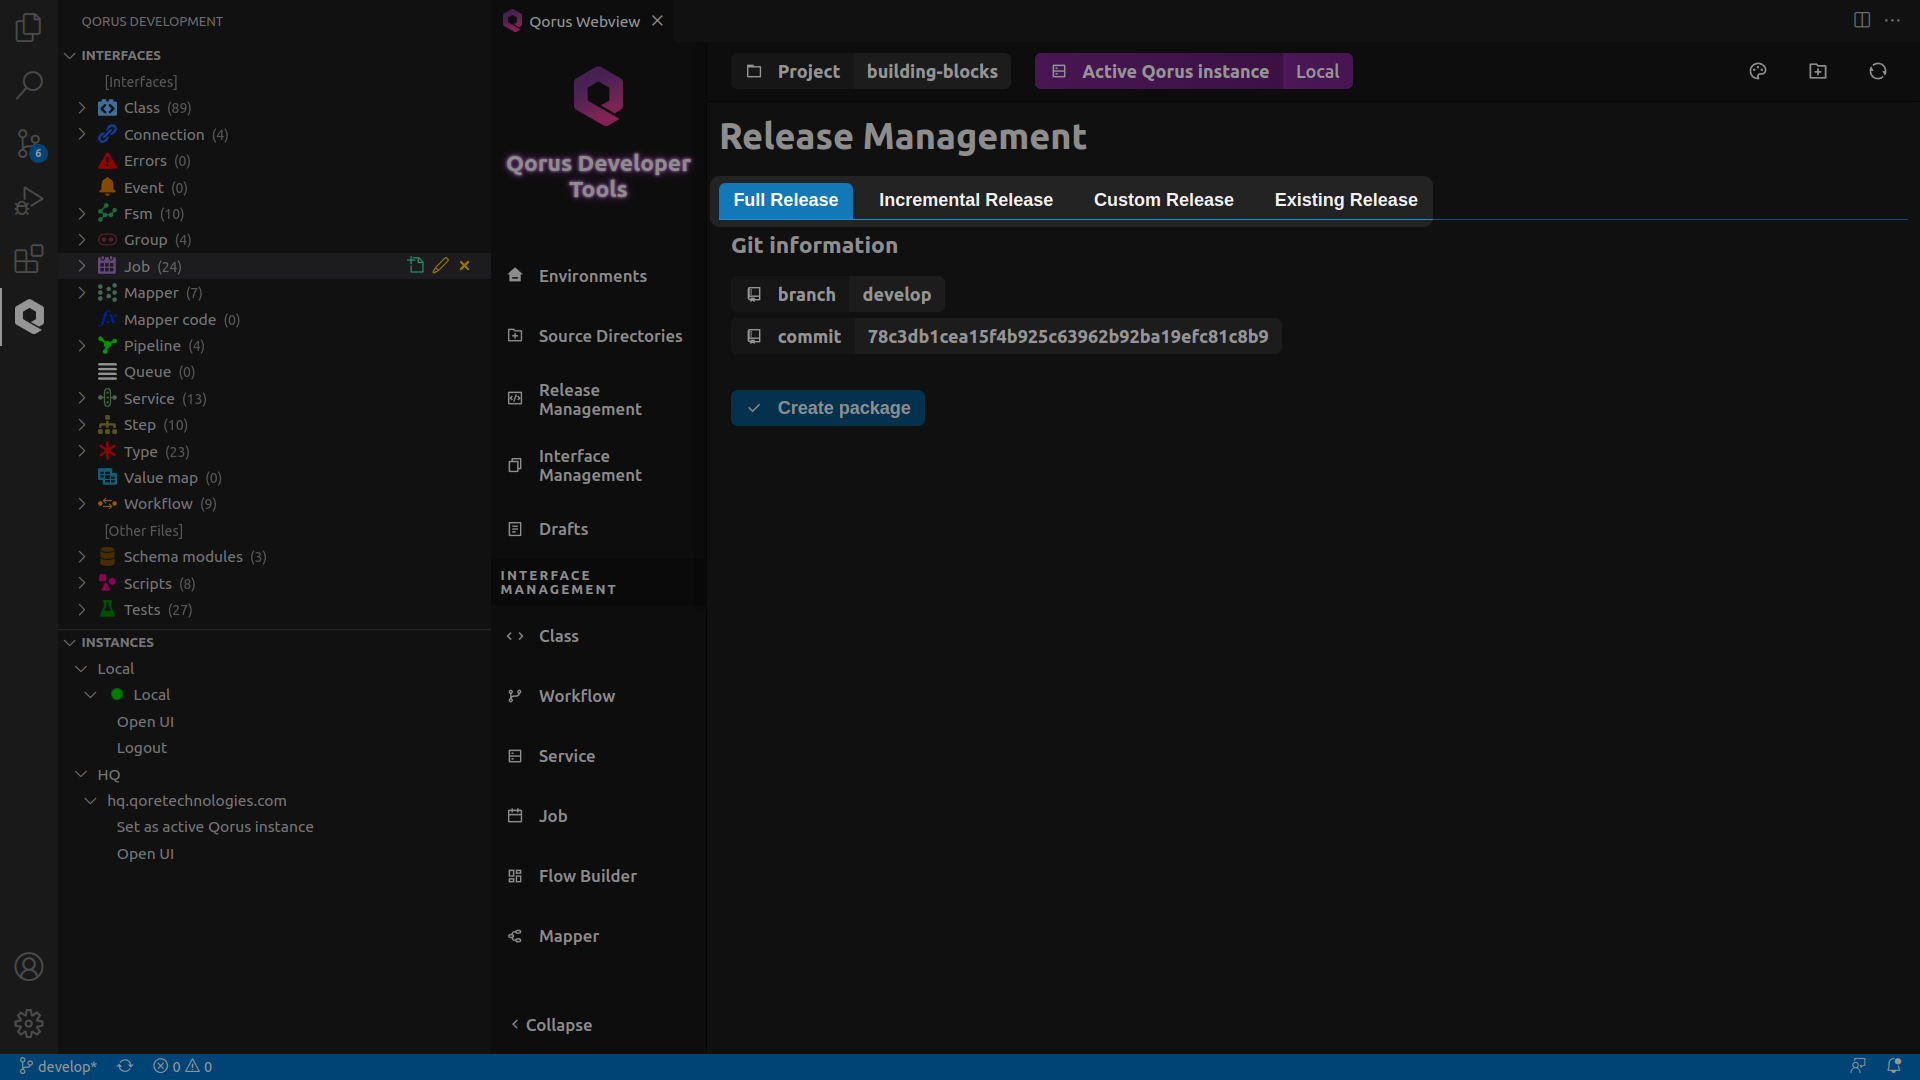
In the IDE, you can choose which interfaces to include in the release by going to the Make release menu in the Qorus Webview window’s sidebar.
In the Make release menu, all the available interfaces are grouped by type. To include them in the release, click the radio button next to the interface. Furthermore, you can set a release type by clicking the Selected release type dropdown menu. The types of releases supported are:
custom: allows the user to choose the objects to go in the releasefull: includes all files in the releaseincremental: assumes that the project folder is checked out from a git repository and allows the user to release files changed from another branchexisting: allows the user to use an existing release file
ℹ️ Note: After creating the release, the file can optionally be deployed to the current Qorus instance
5. Deleting Qorus Objects on the Server
To delete an Interface object, click on the trashcan icon next to its name in the hierarchy view. This however, only deletes the object locally. To delete an object on the server, you must use the Delete interfaces menu in the Qorus Webview window’s sidebar.
All the objects on the server are organized under their type in tabs. To delete an object on the server, select the object you want to delete and press the Delete selected jobs button.
YAML metadata can be edited by hand, but it is strongly recommended to use the IDE to do so instead. It is very easy to make invalid YAML, including YAML data that looks valid or similar to working data that is not accepted by the Qorus server or the IDE itself.
ℹ️Note: All developer activities can also be performed with a simple editor and the command line client except for creating and editing objects with metadata. Qorus objects are always represented by a YAML metadata file. If the object contains code, then the source code can be found in another file in the Target directory. To create or edit Qorus objects with metadata, the IDE must be used.
Conclusion
Qorus IDE is the developer’s interface to Qorus for creating integration/automation solution components, making release packages, deploying code to the server. The Qorus IDE enables the platform to be a no-code platform for coders. All of Qorus’s no-code capabilities can be created, extended or enhanced with the IDE.