In this post, you’ll learn how to get Qorus up and running. You’ll get started by learning how to run a Qorus image in a Docker container. Then, you’ll learn how to communicate with remote Qorus instances, and finally, you’ll test your setup by implementing a “Hello, world” example.
Requirements
- git
- Docker
- A Qorus image for Docker
- Python3, pip
- qorus-remote – our python client to communicate with remote Qorus instances
- Qorus Developer Tools extension for Visual Studio Code
Running Qorus in Docker</span
git clone https://git.qoretechnologies.com/qorus/qorus-docker.git
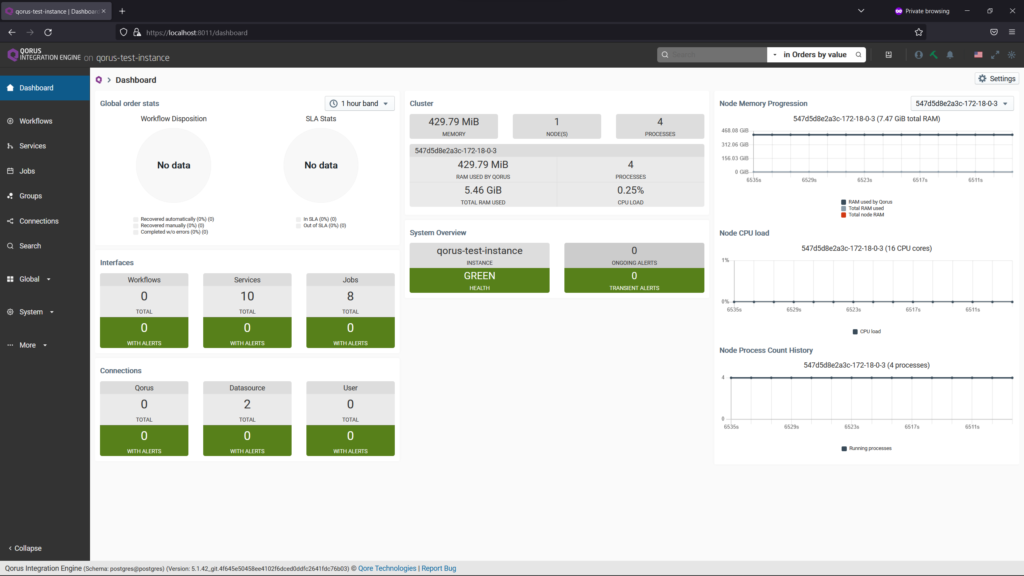
cd qorus-docker/docker docker-compose up -d This will create a PostgreSQL database schema for Qorus, and local volumes for persistent data. Qorus will start with an HTTPS listener on port 8011 with RBAC disabled.
With RBAC disabled, you can connect to Qorus by visiting https://localhost:8011 without authentication. There, you’ll have access to the Qorus dashboard.

ℹ️ Note: Your browser might issue a security warning when trying to reach Qorus at localhost:8011. This is because Qorus is running with a self-signed certificate. You can safely ignore this warning.
Logging With Qorus
Qorus has a robust logging system. By default, the logs are written to the /opt/qorus/log directory in the Docker container. When setting up Qorus 6+ for the first time, schema archiving is set up with a 90-day data retention period and DB purging of older data as well as daily log rotation, bz2 archiving in the arch subdirectory, and 90-day log file retention. To enable this in a Qorus instance uprgraded from a previous version where schema archiving and log rotation was not enabled, run the schema-tool -m in your Docker container.
The schema-tool script is located in the /opt/qorus/bin directory on the Docker container. You can execute this script from the host machine by:
docker exec [Qorus CONTAINER ID] bash --login -c "schema-tool -m"
set config item arch.day-interval = 90

activated the qorus-archiver job

activated the qorus-log-rotator job

changes made; DB archiving and log rotation are enabled
Communicating With Remote Qorus Instances
Qorus comes with a Python client package (qorus-remote) for working with remote Qorus instances. qorus-remote provisions the execution of command-line programs on remote Qorus servers and for the output to be displayed locally in real time. The means of this communication are the REST API and the WebSocket protocol. Therefore, you can use the command line as well as the IDE to work with Qorus.
Install qorus-remote with:
pip install qorus-remote ℹ️ Note: On Linux, sometimes pip installs executables into a custom directory; in these cases, it’s necessary to add $HOME/.local/bin to your path in your setup script – i.e. $HOME/.bashrc, or $HOME/.bash_profile ( if you are using zsh then ~/.zprofile or ~/.zshrc )
Now, configure the .netrc file to provide the login information required to access a Qorus remote server. For a Qorus server located at https://localhost:8011 and using the Qorus user adm, you should have:
machine localhost

port 8011

secure yes

login adm

password adm

timeout 120

verbose no
.netrc files are usually placed in the home directory; therefore, write the above contents to a file and save it at:~/.netrc-qorus-local %USERPROFILE%\qorus\netrc-qorus-local Usage
qorus-remote-commands [-h|--help|--usage] <NETRC-FILE> <COMMAND> [<COMMAND-ARGS> ...] qorus-remote:oload– loads sources and configuration into the Qorus server.qctl– main interface for the qorus cluster.qrest– the command-line REST API interface.qdp– the command-line interface to the Data Provider API
Aliases
It’s recommended to create aliases for each of the commands, like:
On Windows Command Prompt
DOSKEY oload=qorus-remote-commands %USERPROFILE%\qorus\netrc-qorus-local oload $*DOSKEY qctl=qorus-remote-commands %USERPROFILE%\qorus\netrc-qorus-local qctl $*DOSKEY qrest=qorus-remote-commands %USERPROFILE%\qorus\netrc-qorus-local qrest $*DOSKEY qdp=qorus-remote-commands %USERPROFILE%\qorus\netrc-qorus-local qdp $*
alias oload='qorus-remote-commands ~/.netrc-qorus-local oload $*'alias qctl='qorus-remote-commands ~/.netrc-qorus-local qctl $*'alias qrest='qorus-remote-commands ~/.netrc-qorus-local qrest $*'alias qdp='qorus-remote-commands ~/.netrc-qorus-local qdp $*'
and so on…
After setting aliases, you can test the python client (qorus-remote) by:
qctl ps– get a list of cluster processesqctl threads qorus-core– get a list of thread stacks for theqorus-coreprocessoload -Ls– lists the services installed in the databaseqrest system/instance-key– returns the system instance key name from the REST API (configured in$OMQ_DIR/etc/options– change requires a restart)
ℹ️ Note: $OMQ_DIR refers to the /opt/qorus on the Docker container. On linux/mac host this is (docker compose file directory)/omq/user directory, and on windows host (docker compose file directory)\omq\user directory. docker compose file directory is the directory from which you ran the docker-compose up -d instruction earlier.

